
Art Canvas Factory is a leading manufacturer of new age artist canvases, as well as the originator of their patented canvas stretcher design!
Why must your art talent suffer because of low grade and quality canvas mounts?
www.artcanvasfactory.com
Showing posts with label canvas ideas. Show all posts
Showing posts with label canvas ideas. Show all posts
Saturday, February 8, 2020
Wednesday, February 5, 2020
Monday, February 3, 2020
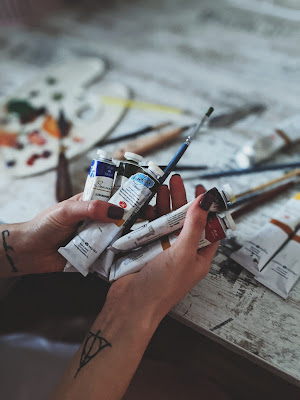
Oil Painter - Few Amazing Tips to Become Good Oil Painter: By Murtaza Habib
Oil paint contains a unique process and an artist has to understand it properly, if he wants to create a better painting. The purpose of this article is to make sure that you learn the basic process of oil painting and create beautiful painting. The basic law of oil painting is to find out the technique that suits your style and personality.
It's important that you learn the language and laws of oil painting as under, if you are new to this painting style.
1. This paint is wet.
2. This painting style is done using brushes.
3. It is different as compared to other painting media you have been using.
You have to think like an oil painter to create good oil paintings. Accept the fact that the oil painter looks at the world differently as compared to other people. Don't focus on the subject that is given to you for painting.
Keep the oil paint in your mind and treat the subject like the process only. Clear the process in your mind and apply the action using your brush. When you gain this thinking style, you can create any kind of painting no matter what the subject is. Don't take this point lightly, because I have told you the secret that I have never told anyone as yet. You should have your own unique style to see the world.
Capture the new ideas and make a note if possible. Always be confident about your success while creating the painting. Choose the right method that suits your style and keep going on. Don't confuse yourself by asking many questions regarding the selection of surface, brush and other stuff. You just need to keep remember all the procedure required to create the painting.
If possible then read the oil painting books and gain deep knowledge regarding this painting style.
Learn from todays expert how to paint and draw step by step with the help of pictures on your core subject whether it is oil, watercolor, acrylic, fabric painting, pencil, cartoon drawing, or digital art.
Explore your creativity with these 1750 tutorials - Painting and Drawing lessons [http://www.paintonmycanvas.com/ezine.html]
'Murtaza Habib' has helped hundreds of newbies to start their painting courses, now you can do it too...
Article Source: Here
Photo: Valeriia
It's important that you learn the language and laws of oil painting as under, if you are new to this painting style.
1. This paint is wet.
2. This painting style is done using brushes.
3. It is different as compared to other painting media you have been using.
You have to think like an oil painter to create good oil paintings. Accept the fact that the oil painter looks at the world differently as compared to other people. Don't focus on the subject that is given to you for painting.

Keep the oil paint in your mind and treat the subject like the process only. Clear the process in your mind and apply the action using your brush. When you gain this thinking style, you can create any kind of painting no matter what the subject is. Don't take this point lightly, because I have told you the secret that I have never told anyone as yet. You should have your own unique style to see the world.
Capture the new ideas and make a note if possible. Always be confident about your success while creating the painting. Choose the right method that suits your style and keep going on. Don't confuse yourself by asking many questions regarding the selection of surface, brush and other stuff. You just need to keep remember all the procedure required to create the painting.
If possible then read the oil painting books and gain deep knowledge regarding this painting style.
Learn from todays expert how to paint and draw step by step with the help of pictures on your core subject whether it is oil, watercolor, acrylic, fabric painting, pencil, cartoon drawing, or digital art.
Explore your creativity with these 1750 tutorials - Painting and Drawing lessons [http://www.paintonmycanvas.com/ezine.html]
'Murtaza Habib' has helped hundreds of newbies to start their painting courses, now you can do it too...
Article Source: Here
Photo: Valeriia
Saturday, February 1, 2020
Wednesday, January 29, 2020
Saturday, January 18, 2020
Painting Styles - Painting Has Undergone Variety Of Experiments
Paintings manifest the thoughts and visions of human beings through the language of art. A wide array of painting styles, methods and techniques has enhanced the horizon of painting making it more enriched and versatile. Painting has undergone variety of experiments under the hands of the master artists, which resulted into a vast selection of painting styles. The core philosophy behind the artwork, the painting styles introduce us to the various movements and schools of art. A single style also serves as a record of a particular historical period and culture prevalent during the time. Painters generally opt a particular painting style and carve their portraits typifying that specific style. Hence it is very necessary to read the various painting styles to understand the subtle strokes of each artwork.

The painting styles are visible with the emergence of 'Romanesque Art' in the eleventh century. The Romanesque paintings characterized by decorative leaf motifs are to be viewed in all Roman imperial structures. The 'Gothic Style of Paintings' evolved in the mid twelfth century in the form of frescos, panel paintings, manuscripts and stained glasses.
Oil and canvas paintings became popular in the later time with the origin of the 'Renaissance Style of Art' in the fourteenth century. Art became more realistic and secular through linear forms, anatomical shapes and use of light and shadow. The legendaries of paintings Raphael, Michelangelo and Leonardo da Vinci were artists of the Renaissance period. 'Baroque Style of Painting' evolved in the seventeenth century with the 'Baroque Cultural Movement'. Highly passionate, the paintings enlivened an ongoing action into art.
The 'Impressionism' of the nineteenth century world is articulated through 'Impressionistic Paintings'. Ordinary themes from the nature and surrounding world were painted through distinct brush strokes. 'Pointillism' invoked a new technique of painting where tiny dots of primary colors were blended to form an image creating an impression of miscellaneous colors. 'Expressionistic Paintings' of the early twentieth century are artistic expressions of subjective emotions that painters experience from the subjective world.
Among the modern styles of paintings, 'Cubism' is popular. A precursor to abstract painting 'Cubic Paintings' introduced geometric shapes and figures as images. Pablo Picasso, Georges Braque and Marc Chagall are the noted painters of Cubism. Another famous painting style during the1920s was the 'Surrealistic Paintings'. The painters used beautiful images and incongruous juxtapositions to represent unconscious thoughts and dreams. The 'Dada Painting Styles' of the time of the First World War represented art works that conveyed a nihilistic attitude towards conventionalism. The paintings were a revolt against the aesthetic and contemporary style of art.
Abstract Painting is perhaps the most difficult and complex of all painting styles. Painting is portrayed in an objective and non-representational way through colors and lines. The paints are dropped, lined and smeared over the canvas generating an idea non-captured in image form. Jackson Pollock, Pier Mondrian and Barnett Newman are some famous abstract painters. Abstract Expressionism is an art movement of the post World War II. It emphasized the non-representational style of abstract art in a more audacious and dramatic way. Postmodern Art reflects the modern consumerism and the contemporary culture in the paintings. It rejects the elaborately narrative depictions of the modern art and emphasizes more on the insincerity and discontinuity that is more feasible in the present day.
For comprehensive information on paintings and related topics, please visit Ethnic Paintings
Amit Singh is Content Coordinator for http://ethnicpaintings.com This website gives you comprehensive informations on painting history, development, trends, popular painting styles, great painters, famous paintings, painting galleries and museums, painting tips, painting classes. In other words, this website is a treat to painting freaks.
Article Source: https://EzineArticles.com/expert/Amitseo_Kumar_Singh/179772
Wednesday, January 15, 2020
Art Supplies - Buying and Cleaning Paint Brushes
Remember when you were in grade school and painting seemed so simple because your teacher just handed you art supplies and helped wash brushes afterwards? Approaching the medium as a more mature artist, you must learn about paintbrush materials and how to properly care for your brushes.

First, you must decide whether you will need soft or stiff hairs for your paintbrush. Either can be made of natural hairs or synthetic fibers. A thin paintbrush is ideal when you want to do detailed work or precise painting. It allows you to spread paint easily. Hard bristles on the other hand are better for manipulating thick paint. This allows you to create brush marks in the paint that can be seen on the canvas. Vincent van Gogh's work is famous for this technique, as evidenced by his painting The Starry Night.
Most purists will say that natural hair will always be superior to synthetic fiber because of its flexibility and strength. The hair for paintbrushes comes from animals including Sable, squirrel, hog, camel, ox, pony and goat. If the thought of using hair from one of these animals makes you squeamish or you have ideological problems with this, do not fear: modern synthetic brushes have come a long way and are even less expensive than their natural hair counterparts.
The next step is to learn a little bit about paintbrush anatomy. The handle is usually made of wood and is called the ferrule. This holds the hairs or bristles. The tip of the bristles is referred to as the toe.
When deciding which paintbrush to use it is important to know the size of the brush. This can be determined by looking at a number on the side of the handle. The smallest size is 00 followed by 0, 1, 2 and so on. If you are buying online it is important to see a picture of the brush you're purchasing. Two brushes sized the same can actually be very different because of the number of bristles and the width of the handle. This problem can be alleviated if you shop in an actual store or are already familiar with the brand of brush.
It takes a lot of time and money to get the right paintbrush, so it makes sense to take care of them, which includes proper cleaning after each use.
Before you get started, make sure you have mild soap (or turpentine if appropriate) and some tissue. You will also need lukewarm water and a place to dry your brushes.
Wipe off the excess paint using a soft cloth or tissue. Then, rinse your brushes in turpentine if you are using oils, but use lukewarm water if you're paint is water-based. Hot water can cause the hairs of your brush to fall out. Afterwards, gently wash your brushes with mild soap. Rinse and repeat as many times as necessary until no color comes out and your brush returns to its original color. Next rinse your paintbrush in clean water. Remember to shake off the excess water after this. If the brushes seem misshapen, use your fingers to gently bring the brush head back to its original shape.
Now you are ready to dry the paintbrushes. Wrap the bristles in tissue or toilet paper while they are wet. When the bristles dry they will contract in this way and will maintain their shape. Let the brushes dry at room temperature. Be sure not to rest them on their head because this is another potential hazard to maintaining appropriate shape.
Since some of these materials can be toxic protect your skin with a pair of gloves. These can be purchased at an art store or even at a drugstore or hardware store.
Anne Clarke writes numerous articles for Web sites on art supplies, fashion, and home decor. Her background also includes teaching, gardening, and parenting. For more of her useful articles on art supplies, please visit Art Supplies, home of helpful tips and information about art and art supplies.
Article Source: https://EzineArticles.com/expert/Anne_Clarke/33662
Monday, January 13, 2020
Learn How To Paint Watercolors Fast - Use Only 1 Color
Learning to paint fast is difficult. Some say it feels impossible...
But it doesn't have to be so hard...
Like all skills, whether in Arts, Crafts or any profession the trick is to remove complication. Watch any expert work and you will be amazed how quickly they make the impossible seem easy...
Think of a Blacksmith making horseshoes on his anvil...
He knows how to make the fire hot enough to make the metal soft without melting
He knows that every strike of his hammer will shape and mould the steel
He knows just how to trim the hoof to make the shoe fit
He never doubts his ability to give the horse he makes the shoes for exactly what is needed for comfort and wear
It is an honor to see a craftsman at work. It is a privilege to witness the accumulation of many years hands-on knowledge.
Learning to be an artist takes time. Learning to paint professionally can take many years...
The fastest way to learn to paint watercolors is to take it in small stages... starting simple and building painting skills with small steps.
The first step is to paint watercolor using 1 color... it can't get any simpler...

You learn how to thin watercolor paint with your brush
You learn how much water you need to get a certain tone of color
You learn how to use water to carry color pigment across your watercolor paper
You learn what can go wrong when you touch your wet paper with a brush full of color
You learn to expect surprises
You learn to want to encourage surprises by experimenting with new techniques
And, most importantly, you get the opportunity to learn to draw with your watercolor brush... You learn how to make your brush become your best friend.
When you use only 1 color to learn how to paint watercolors it is easy to concentrate...
You can quickly learn how to get color tone right
You soon learn that color will flood and spread across wet paper
You know that if an earlier wash is fully dry it will be spoiled if you let your next brush mark touch
You find yourself doing amazing things with watercolors fast because you don't have to worry about which colors you need to mix that favorite green, or the orange you saw in last night's sunset.
Learning how to paint watercolors using only 1 color helps you learn fast because you don't even need to worry about making mistakes...
It is quick and easy to do it again because you have kept it simple
You have perfected the basics of learning watercolor painting
Perfect the basics of watercolor painting and nothing can stop you from mastering the next stage... Learning How To Mix Colors.
Michael Dale is the author of 1- Color Is Best (the quick and easy way to learn to paint watercolor) and 3- Colors Are All You Need (mix any color you want fast using only 3 colors). Contact [http://www.Paint-And-Draw.com] to find out more.
Article Source: https://EzineArticles.com/expert/Michael_Dale/145082
Monday, January 6, 2020
Wednesday, January 1, 2020
Wednesday, December 25, 2019
Friday, December 20, 2019
Choosing The Right Brushes For Oil Painting
Paint brushes come in a variety of shapes, sizes, materials, and costs. Determining which one is right for you, and when it is the right one, depends largely on how you want to use it. The main types of brushes are china bristle, soft hair, and synthetic bristle.

China Bristle Brushes
China bristle brushes, also called hog bristle or Chungking bristle, are made from natural pig hair. They are tough, durable brushes, able to stand up to the oil while still cleaning up nicely. They can hold a lot of paint, making them ideal for alla prima painting or impasto.
Soft Hair Brushes
Soft hair brushes are made from Kolinsky sable or ox hair, or more rarely squirrel, pony, goat, mongoose or badger. Soft hair brushes are much softer than china bristles, and a lot more expensive. It's not unheard of to pay several hundred dollars for a large sable brush. But for more delicate work, like blending and glazing, soft hair brushes are indispensable.
Synthetic Bristle Brushes
For quality and affordability, you can't go wrong with synthetic bristle brushes. Though turpentine or thinners used in oil painting can destroy some types of synthetic brushes, recent innovations in synthetic bristle technology have produced solvent resistant brushes.
Be careful, though. While affordability is a legitimate consideration when choosing your brushes, don't let it be the main one. Those brushes in the multi-packs may look just as good as the others, at a fraction of the cost, but you will end up with brushes warped and falling apart in no time.
Brush Shapes
Paint brushes come in several shapes, each designed to apply the paint in specific ways. The most useful shapes you will use in oil painting, in no particular order, are:
Flat - Designed to spread paint quickly and evenly to an area.
Bright - Similar to a flat brush, but with short, stiff bristles. Great for impasto work.
Round - Long, closely arranged bristles used for drawing or detail work.
Filbert - These almond-shaped brushes offer good coverage and the ability to perform some detail work
Fan Brush - Used for blending broad areas and creating different textures.
Liner Brush - Used for lettering and fine detail work.
By no means do you have to use, or even have, all of these brushes. Experiment and find the shape that works for you.
Brush Sizes
Brushes are sized by numbers based on the width of the brush at the metal sleeve, or ferrule, which holds the bristles in place. The size of your painting surface will help determine the size of the brush you use. For example, a brush that is 2 inches wide will be used on a canvas that is at least two or three feet in either direction.
However, this is just a rule of thumb. As with brush shapes, the sizes you choose will ultimately be determined by personal preference. So go get some brushes and start painting.
To learn more, please visit me at [http://www.oilandpigment.blogspot.com] for a look at my own paintings and works in progress.
Article Source: https://EzineArticles.com/expert/Rob_Pitts/88587
Friday, December 13, 2019
Five Most Common Problems Beginner Painters Have
For people who are interested in learning how to paint with either acrylic or oil paint may experience a few common learning problems. These are the most common problems people have when they are learning how to paint. You can overcome these common problems with some basic knowledge and problem solving skills that will eventually get you past these difficulties.

There are five common problems beginner painters have:
1. Very little experience in drawing prior to learning how to paint.
You really need to have some knowledge or experience in beginning drawing before you ever pick up a paint brush. Using a pencil to draw is a lot easier skill than using a paint brush. You should have some basic knowledge about shapes, forms, lines, and values (shading) to enable you to understand how to manipulate colors in your paint. You need to take your time and not hurry through your drawing in order to get the composition of your picture placed in the most effective way in your picture. If you can draw out the picture in a sketch book prior to actually drawing it on your canvas; this will help to iron out any problems that may arise with your composition. Having some skill and practice at the drawing level will definitely help you have a more successful painting.
2. Not being organized from the beginning with how you set up your palette.
When you first learn how to paint you need to be organized with all your paint colors from the beginning. That means to set out your paints on your palette in the same order every time. Try to leave the most room on your palette for mixing your colors. You will have to mix just about every color you use to paint with so you need to have room on your palette for these color mixtures. As a beginner, you will be using trial and error to get the color you want and this will take time and practice to learn which colors you need to mix together to get what you want. If you put your paints out all over your palette with no apparent order, you will not have any room for mixing and will end up having to clean off your palette and starting with a clean palette.
3. Not putting enough paint on your palette the first time.
Many beginner painters will squeeze out a tiny bit of paint on their palette and find that they run out of that particular color rather rapidly and need to get more from the tube again. This can be a problem when you are using that particular color to mix with to make another color with. Don't be stingy with the paint, it is OK to squeeze out a generous amount of paint onto the palette. The paint will stay moist for several days (especially if you put it in the refrigerator) You will use up the paint eventually.
4. Brush work problems of over-doing the brush strokes,
Another common problem beginner painters have is they repeatedly paint over the same area inadvertently ending up with mud. There is a tendency to keep on stroking the same area in the hope it will magically change into something they are trying to do. Unfortunately painting doesn't work that way. Each paint stroke needs to be thought out carefully and done in a way that will not interfere with the other colors. Some of the color do not go together well and this may be the cause of the "mud" in the end. It is very frustrating for the beginner painter to encounter this problem. It is a matter of learning the color theory and learning more skill at handling the paint brush. This comes with time and experience.
5. Forgetting to clean the paint brush frequently and especially between colors.
It is vital to clean your brush frequently while you are painting. Especially when changing to a different color. For a beginning painter it is very easy to forget to clean the brush and accidentally contaminate one of your lighter colors with a previous darker color you were using. This can happen either on the palette or on the canvas. If it happens on the canvas it can sometimes be difficult to fix the area, you may have to just wipe the area off and start again. Even if you don't clean your brush off in the turp solvent, you can still just wipe it off on a paper towel or a rag and that will help.
Article Source: https://EzineArticles.com/expert/Marilou_O'Loughlin/208858
Friday, November 29, 2019
Weekend Big Screen Feature: "The Secret of Drawing" Episode 3: "All In The Mind"
Every weekend we feature a full length art movie / Documentary! So grab the pop corn and enjoy!
Wednesday, November 20, 2019
Wednesday, November 13, 2019
Wednesday, November 6, 2019
Wednesday, October 30, 2019
Monday, October 14, 2019
Friday, October 4, 2019
Craig Banks discovers charcoal magic on canvas!
My experience with charcoal on canvas.
I'm one of those artists who hates to try new things as I foolishly and unrealistically expect any new attempt to instantly be on the same level as a medium I've spent 20 years to perfect. (pencil on paper is my all time one true love) The frustration of creating an artwork in a different medium and realising its way below my standard made me almost go crazy!

Then I decided to give charcoal on canvas a go.
Bottom line... It works!
With pencil on paper, my portraits are neat and tidy, soft and subtle but with charcoal on high quality canvas, my work ends up gritty yet intricate, smooth yet full of stark contrast and most importantly I am happy with the result and in time will be equal to my pencil offerings.
I am still learning. I still struggle... Especially with the finer details that pencil work is best suited for and being self taught for my entire art career I prefer to develop my own methods that fit with my unique style. Earbuds for example.. Smooths out any charcoal smudge like a dream!


Big thanks to my dealer Art Canvas Factory for supplying my canvas needs... You have made the struggle awesome!
Craig Banks FaceBook
Subscribe to:
Posts (Atom)