Showing posts with label art tutorial. Show all posts

Monday, February 17, 2020

5 Popular Painting Styles: By Mayra A

5 Essential Painting styles to know and learn in order to effectively communicate and understand terms in the art world.

Baroque:
The Baroque style of painting originated in Rome and generally has a religious theme or is centralized around court life. Baroque paintings can be characterized by the abundance of details within the paintings as well as a sense of grandeur. Like the painting style, the word Baroque has come to mean something elaborate, including many small details.

Popular Baroque Painters Include:
Anthony Van Dyck
Paul Rubens
Vermeer
Claude Lorrain
Baciaccia
Agostino Carracci

Photo Credit

Cubism:
Cubism became a popular style of painting in the early 20th century. The cubist style of painting is abstract, where one can visualize the theme of the painting, but the objects are broken up and re-assembled into un-life like representations. With cubism, the artist attempts to show the viewer the subject from a multitude of viewpoints.

Cubism is often associated with Pablo Picasso paintings, one of the innovators of this style of painting. Another famous cubist artist is Georges Braque.

Photo: Credit

Expressionism:
The expressionist movement originated in Germany around 1905. Unlike the popular Impressionism painting style, expressionism attempts to provide the viewer with the painters view and opinion of the world and the subjects. This creates an image that is the artists own interpretation of the situation, often distorting reality and providing more of an emotional effect to the viewers. The Expressionist movement is known for paintings that represent and express intense emotion or angst.

Popular Expressionistic Artists include:
Vincent Van Gough
Edvard Munch
Salvador Dali
Henri Matisse

Photo: Credit

Impressionism: The impressionist art movement began around the 19th century in Paris. Impressionist style emphasizes the fine details of every day objects including how light, colors, and the passage of time can affect the subject. This style generally concentrates on visible brushstrokes, light colors, primary colors and small brushstrokes.

Popular Impressionistic Artists Include:
Edgar Degas
Claude Monet
Pierre Auguste Renoir

Photo: Credit

Minimalist: The minimalist style of painting originated in America and has been subject to much criticism since its inception. The style of painting includes minimal details, the details that are included are often represented by precise, hard brushstrokes and often include geometric forms. The color palette of these styles generally include a limited amount of unmixed, primary colors. The style of painting represents something that is spare and has been stripped to its most basic forms.

Popular Minimalist Artists Include:
Frank Stella
Ad Reinhardt
Robert Morris

Photo: Credit

The world of art and paintings is endless, and learning about its history, styles techniques and other useful information about painting is an ongoing task.

Want to learn more? Visit TheHelpIsHere.com [http://www.thehelpishere.com]

which offers thousands of useful help and how to articles on a variety of topics. All content is free to access, including our coupons and deals section, reviews, articles, and freebies area.

Article Source: https://EzineArticles.com/expert/Mayra_A/170644


Article Source: http://EzineArticles.com/2148593

Wednesday, January 15, 2020

Art Supplies - Buying and Cleaning Paint Brushes

Remember when you were in grade school and painting seemed so simple because your teacher just handed you art supplies and helped wash brushes afterwards? Approaching the medium as a more mature artist, you must learn about paintbrush materials and how to properly care for your brushes.


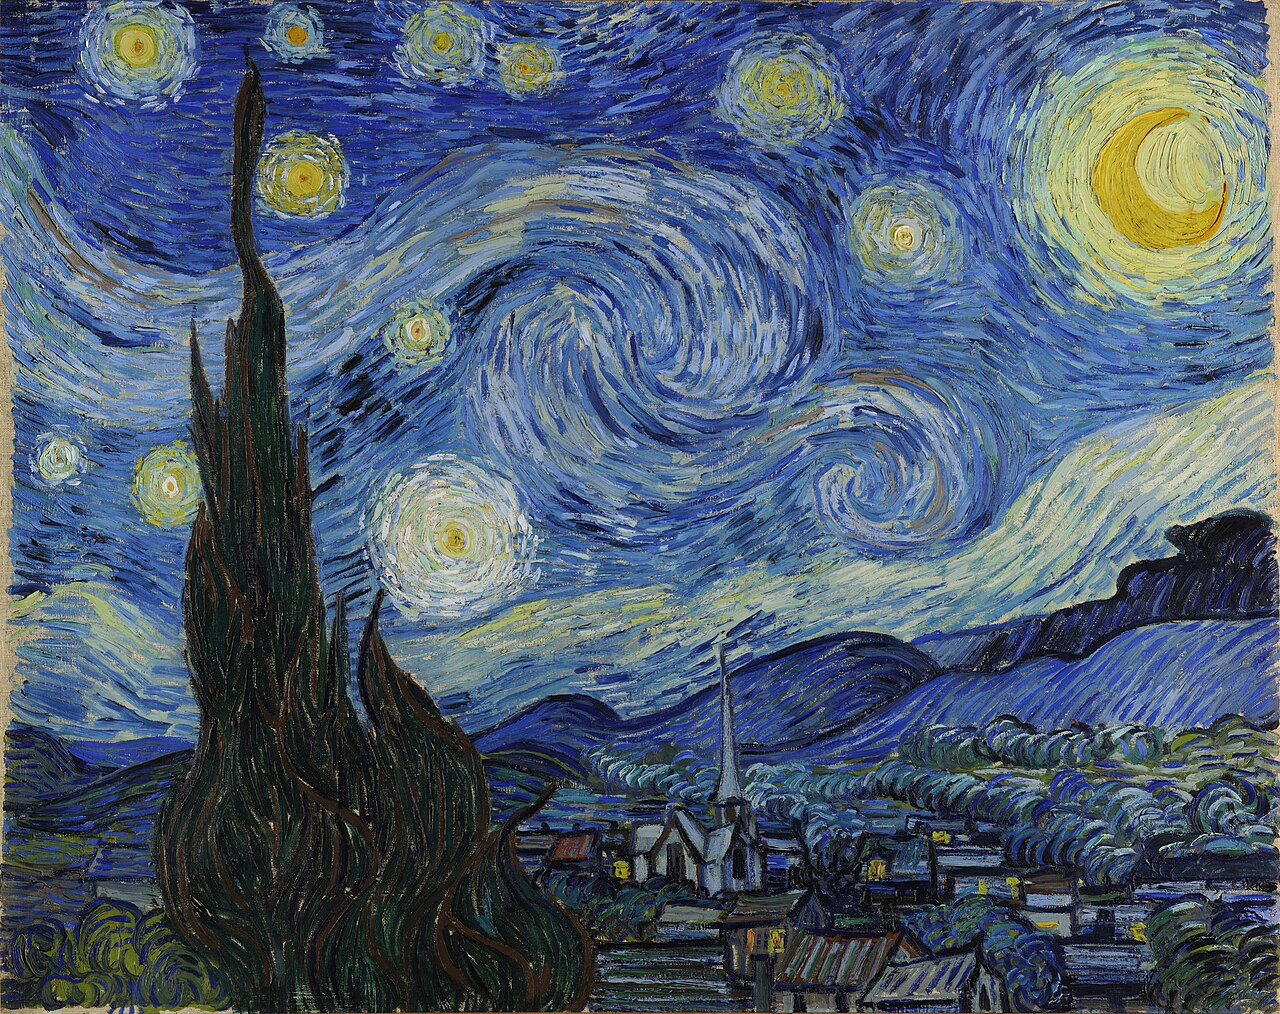
First, you must decide whether you will need soft or stiff hairs for your paintbrush. Either can be made of natural hairs or synthetic fibers. A thin paintbrush is ideal when you want to do detailed work or precise painting. It allows you to spread paint easily. Hard bristles on the other hand are better for manipulating thick paint. This allows you to create brush marks in the paint that can be seen on the canvas. Vincent van Gogh's work is famous for this technique, as evidenced by his painting The Starry Night.

Most purists will say that natural hair will always be superior to synthetic fiber because of its flexibility and strength. The hair for paintbrushes comes from animals including Sable, squirrel, hog, camel, ox, pony and goat. If the thought of using hair from one of these animals makes you squeamish or you have ideological problems with this, do not fear: modern synthetic brushes have come a long way and are even less expensive than their natural hair counterparts.

The next step is to learn a little bit about paintbrush anatomy. The handle is usually made of wood and is called the ferrule. This holds the hairs or bristles. The tip of the bristles is referred to as the toe.

When deciding which paintbrush to use it is important to know the size of the brush. This can be determined by looking at a number on the side of the handle. The smallest size is 00 followed by 0, 1, 2 and so on. If you are buying online it is important to see a picture of the brush you're purchasing. Two brushes sized the same can actually be very different because of the number of bristles and the width of the handle. This problem can be alleviated if you shop in an actual store or are already familiar with the brand of brush.

It takes a lot of time and money to get the right paintbrush, so it makes sense to take care of them, which includes proper cleaning after each use.

Before you get started, make sure you have mild soap (or turpentine if appropriate) and some tissue. You will also need lukewarm water and a place to dry your brushes.

Wipe off the excess paint using a soft cloth or tissue. Then, rinse your brushes in turpentine if you are using oils, but use lukewarm water if you're paint is water-based. Hot water can cause the hairs of your brush to fall out. Afterwards, gently wash your brushes with mild soap. Rinse and repeat as many times as necessary until no color comes out and your brush returns to its original color. Next rinse your paintbrush in clean water. Remember to shake off the excess water after this. If the brushes seem misshapen, use your fingers to gently bring the brush head back to its original shape.

Now you are ready to dry the paintbrushes. Wrap the bristles in tissue or toilet paper while they are wet. When the bristles dry they will contract in this way and will maintain their shape. Let the brushes dry at room temperature. Be sure not to rest them on their head because this is another potential hazard to maintaining appropriate shape.

Since some of these materials can be toxic protect your skin with a pair of gloves. These can be purchased at an art store or even at a drugstore or hardware store.

Anne Clarke writes numerous articles for Web sites on art supplies, fashion, and home decor. Her background also includes teaching, gardening, and parenting. For more of her useful articles on art supplies, please visit Art Supplies, home of helpful tips and information about art and art supplies.

Article Source: https://EzineArticles.com/expert/Anne_Clarke/33662

Monday, January 13, 2020

Learn How To Paint Watercolors Fast - Use Only 1 Color

Learning to paint fast is difficult. Some say it feels impossible...

But it doesn't have to be so hard...

Like all skills, whether in Arts, Crafts or any profession the trick is to remove complication. Watch any expert work and you will be amazed how quickly they make the impossible seem easy...

Think of a Blacksmith making horseshoes on his anvil...

He knows how to make the fire hot enough to make the metal soft without melting
He knows that every strike of his hammer will shape and mould the steel
He knows just how to trim the hoof to make the shoe fit
He never doubts his ability to give the horse he makes the shoes for exactly what is needed for comfort and wear
It is an honor to see a craftsman at work. It is a privilege to witness the accumulation of many years hands-on knowledge.

Learning to be an artist takes time. Learning to paint professionally can take many years...

The fastest way to learn to paint watercolors is to take it in small stages... starting simple and building painting skills with small steps.

The first step is to paint watercolor using 1 color... it can't get any simpler...


You learn how to thin watercolor paint with your brush
You learn how much water you need to get a certain tone of color
You learn how to use water to carry color pigment across your watercolor paper
You learn what can go wrong when you touch your wet paper with a brush full of color
You learn to expect surprises
You learn to want to encourage surprises by experimenting with new techniques
And, most importantly, you get the opportunity to learn to draw with your watercolor brush... You learn how to make your brush become your best friend.

When you use only 1 color to learn how to paint watercolors it is easy to concentrate...

You can quickly learn how to get color tone right
You soon learn that color will flood and spread across wet paper
You know that if an earlier wash is fully dry it will be spoiled if you let your next brush mark touch
You find yourself doing amazing things with watercolors fast because you don't have to worry about which colors you need to mix that favorite green, or the orange you saw in last night's sunset.

Learning how to paint watercolors using only 1 color helps you learn fast because you don't even need to worry about making mistakes...

It is quick and easy to do it again because you have kept it simple
You have perfected the basics of learning watercolor painting
Perfect the basics of watercolor painting and nothing can stop you from mastering the next stage... Learning How To Mix Colors.

Michael Dale is the author of 1- Color Is Best (the quick and easy way to learn to paint watercolor) and 3- Colors Are All You Need (mix any color you want fast using only 3 colors). Contact [http://www.Paint-And-Draw.com] to find out more.

Article Source: https://EzineArticles.com/expert/Michael_Dale/145082

Friday, January 3, 2020

Oil Painting Without Brushes

As a known fact a paint brush is the most common mode of application of an oil color. However there are other methods also to apply paint on to a surface. This article speaks about the different methods of application of paint onto a surface other than the usual paint brushes.


Palette Knives

When you hear about palette knife you would be thinking about palette isn't it? Palette knives have been a traditional tool for mixing the paint. They are the most apt tool to be used for creating smooth and consistent mediums of paints. However there are many painters who use the palette knife in addition to be used as mixing tool, they straight use the palette knife on to the painting surface.

These knives come in different shapes and signs. They are also available in plastic. As far as the mixing is concerned one shape or size is more than sufficient but as the case of using it as a paint brush is considered, the selection of the knife is made in the same way as the case of selecting brushes is considered. There is no shape or size which we can say is right or the apt one for usage. Experimentation is the key if you are working with palette knives if you are considering working with knives. Try the different shapes and you can select the one that gives you the best effects. Generally small and thin brushes are best suited for lining and big knives are the best for loading on the paint.

Stencils

Many artists love using stencils in their paintings. This usage is loved by them especially when there is a usage of repetitive effect and stylish shapes. Stencils are a useful tool. There are pre made stencils available or you even an option of making stencils with your stencil kit. Ensure that you use the right materials for best results.

Stencil usage in paints is not a traditional method so there is no scope that you can find any tutorials for teaching you the technique of stencils. But is important that you keep in mind the fundamentals of the medium like the fat over lean. You might have noticed that in case the paint is thin in consistency then it stagnates around the edges, so in such a case it is important that you apply a thicker layer of painting. Stenciling is a very interesting art, however it is used as one of the under layers but it has amazing effects.

Rags, Sponges, Fingers

Rags, sponges and of course your fingers are all innovative tools in oil painting which can occupy the place of a paint brush.

Ben Jonson is a Copywriter of oil paintings http://www.paintingmax.com He has written many articles like Canvas oil paintings. For more information visit our site [http://www.paintingmax.com/] - Contact him at paintingmax.ben@googlemail.com

Article Source: https://EzineArticles.com/expert/Ben_A_Jonson/228567

Friday, December 20, 2019

Choosing The Right Brushes For Oil Painting

Paint brushes come in a variety of shapes, sizes, materials, and costs. Determining which one is right for you, and when it is the right one, depends largely on how you want to use it. The main types of brushes are china bristle, soft hair, and synthetic bristle.


China Bristle Brushes

China bristle brushes, also called hog bristle or Chungking bristle, are made from natural pig hair. They are tough, durable brushes, able to stand up to the oil while still cleaning up nicely. They can hold a lot of paint, making them ideal for alla prima painting or impasto.

Soft Hair Brushes

Soft hair brushes are made from Kolinsky sable or ox hair, or more rarely squirrel, pony, goat, mongoose or badger. Soft hair brushes are much softer than china bristles, and a lot more expensive. It's not unheard of to pay several hundred dollars for a large sable brush. But for more delicate work, like blending and glazing, soft hair brushes are indispensable.

Synthetic Bristle Brushes

For quality and affordability, you can't go wrong with synthetic bristle brushes. Though turpentine or thinners used in oil painting can destroy some types of synthetic brushes, recent innovations in synthetic bristle technology have produced solvent resistant brushes.

Be careful, though. While affordability is a legitimate consideration when choosing your brushes, don't let it be the main one. Those brushes in the multi-packs may look just as good as the others, at a fraction of the cost, but you will end up with brushes warped and falling apart in no time.

Brush Shapes

Paint brushes come in several shapes, each designed to apply the paint in specific ways. The most useful shapes you will use in oil painting, in no particular order, are:

Flat - Designed to spread paint quickly and evenly to an area.
Bright - Similar to a flat brush, but with short, stiff bristles. Great for impasto work.
Round - Long, closely arranged bristles used for drawing or detail work.
Filbert - These almond-shaped brushes offer good coverage and the ability to perform some detail work
Fan Brush - Used for blending broad areas and creating different textures.
Liner Brush - Used for lettering and fine detail work.
By no means do you have to use, or even have, all of these brushes. Experiment and find the shape that works for you.
Brush Sizes
Brushes are sized by numbers based on the width of the brush at the metal sleeve, or ferrule, which holds the bristles in place. The size of your painting surface will help determine the size of the brush you use. For example, a brush that is 2 inches wide will be used on a canvas that is at least two or three feet in either direction.

However, this is just a rule of thumb. As with brush shapes, the sizes you choose will ultimately be determined by personal preference. So go get some brushes and start painting.

To learn more, please visit me at [http://www.oilandpigment.blogspot.com] for a look at my own paintings and works in progress.

Article Source: https://EzineArticles.com/expert/Rob_Pitts/88587

Friday, December 13, 2019

Five Most Common Problems Beginner Painters Have

For people who are interested in learning how to paint with either acrylic or oil paint may experience a few common learning problems. These are the most common problems people have when they are learning how to paint. You can overcome these common problems with some basic knowledge and problem solving skills that will eventually get you past these difficulties.


There are five common problems beginner painters have:

1. Very little experience in drawing prior to learning how to paint.

You really need to have some knowledge or experience in beginning drawing before you ever pick up a paint brush. Using a pencil to draw is a lot easier skill than using a paint brush. You should have some basic knowledge about shapes, forms, lines, and values (shading) to enable you to understand how to manipulate colors in your paint. You need to take your time and not hurry through your drawing in order to get the composition of your picture placed in the most effective way in your picture. If you can draw out the picture in a sketch book prior to actually drawing it on your canvas; this will help to iron out any problems that may arise with your composition. Having some skill and practice at the drawing level will definitely help you have a more successful painting.

2. Not being organized from the beginning with how you set up your palette.

When you first learn how to paint you need to be organized with all your paint colors from the beginning. That means to set out your paints on your palette in the same order every time. Try to leave the most room on your palette for mixing your colors. You will have to mix just about every color you use to paint with so you need to have room on your palette for these color mixtures. As a beginner, you will be using trial and error to get the color you want and this will take time and practice to learn which colors you need to mix together to get what you want. If you put your paints out all over your palette with no apparent order, you will not have any room for mixing and will end up having to clean off your palette and starting with a clean palette.

3. Not putting enough paint on your palette the first time.

Many beginner painters will squeeze out a tiny bit of paint on their palette and find that they run out of that particular color rather rapidly and need to get more from the tube again. This can be a problem when you are using that particular color to mix with to make another color with. Don't be stingy with the paint, it is OK to squeeze out a generous amount of paint onto the palette. The paint will stay moist for several days (especially if you put it in the refrigerator) You will use up the paint eventually.

4. Brush work problems of over-doing the brush strokes,

Another common problem beginner painters have is they repeatedly paint over the same area inadvertently ending up with mud. There is a tendency to keep on stroking the same area in the hope it will magically change into something they are trying to do. Unfortunately painting doesn't work that way. Each paint stroke needs to be thought out carefully and done in a way that will not interfere with the other colors. Some of the color do not go together well and this may be the cause of the "mud" in the end. It is very frustrating for the beginner painter to encounter this problem. It is a matter of learning the color theory and learning more skill at handling the paint brush. This comes with time and experience.

5. Forgetting to clean the paint brush frequently and especially between colors.

It is vital to clean your brush frequently while you are painting. Especially when changing to a different color. For a beginning painter it is very easy to forget to clean the brush and accidentally contaminate one of your lighter colors with a previous darker color you were using. This can happen either on the palette or on the canvas. If it happens on the canvas it can sometimes be difficult to fix the area, you may have to just wipe the area off and start again. Even if you don't clean your brush off in the turp solvent, you can still just wipe it off on a paper towel or a rag and that will help.


Article Source: https://EzineArticles.com/expert/Marilou_O'Loughlin/208858